Sunday, 5 May 2013

DIY Pseudo-washi tape

Okay, ignore the title of this blog post. I couldn't come up with a better name for this DIY project!
So as you all know, I have been REALLY obsessed with Washi tape recently. {For all those who don't know what Washi tape is, please google it. B-) }
So I am trying to come up with ways to complement the absence of washi tape in my stationery stock at home. But hey, today's post is really versatile and you can actually make your choice of washi tape using this technique!


For all the video hunters, I am sorry I couldn't record a video this week. So yeah, you have to read the whole post today. *Wohahaha*


So today's post is short and not complicated AT ALL.
Click on the pictures to enlarge them!

Here are the things you will need:

  1. Two-way non-foam tape( I got my roll of tape from Crawford Market, Mumbai and it cost me around INR 50 which is less than a dollar)
  2. Handmade/Wrapping/Deco paper/Magazine
  3. Scissor
  4. Pencil and scale (optional)


Le procedure:

1) Okay, so start by choosing a beautiful piece of paper whose pattern you want on your tape. Uh, I am not a boring person but this magazine on banking was the only thing I could find!

So choose your picture (a la Pokemon style- *I choose you*) and cut it out from the magazine. 


Just playin' around.


 2) Flip the paper and start sticking your tape on the back of the desired pattern on the paper.


Sorry for the shabby outlining. :P
This is how the tape will look from either sides of the paper after it is stuck.


3) Use a pencil to outline the tape before cutting it or chuck that start cutting the side of the tape like a boss. B-)


Yes, like a boss.


4) We are on step 4 now. What's next? NOTHING! You're done. Haha.
Choose different patterns to create different types of tape!

I really liked the apple one and the middle one that looks like watercolour!


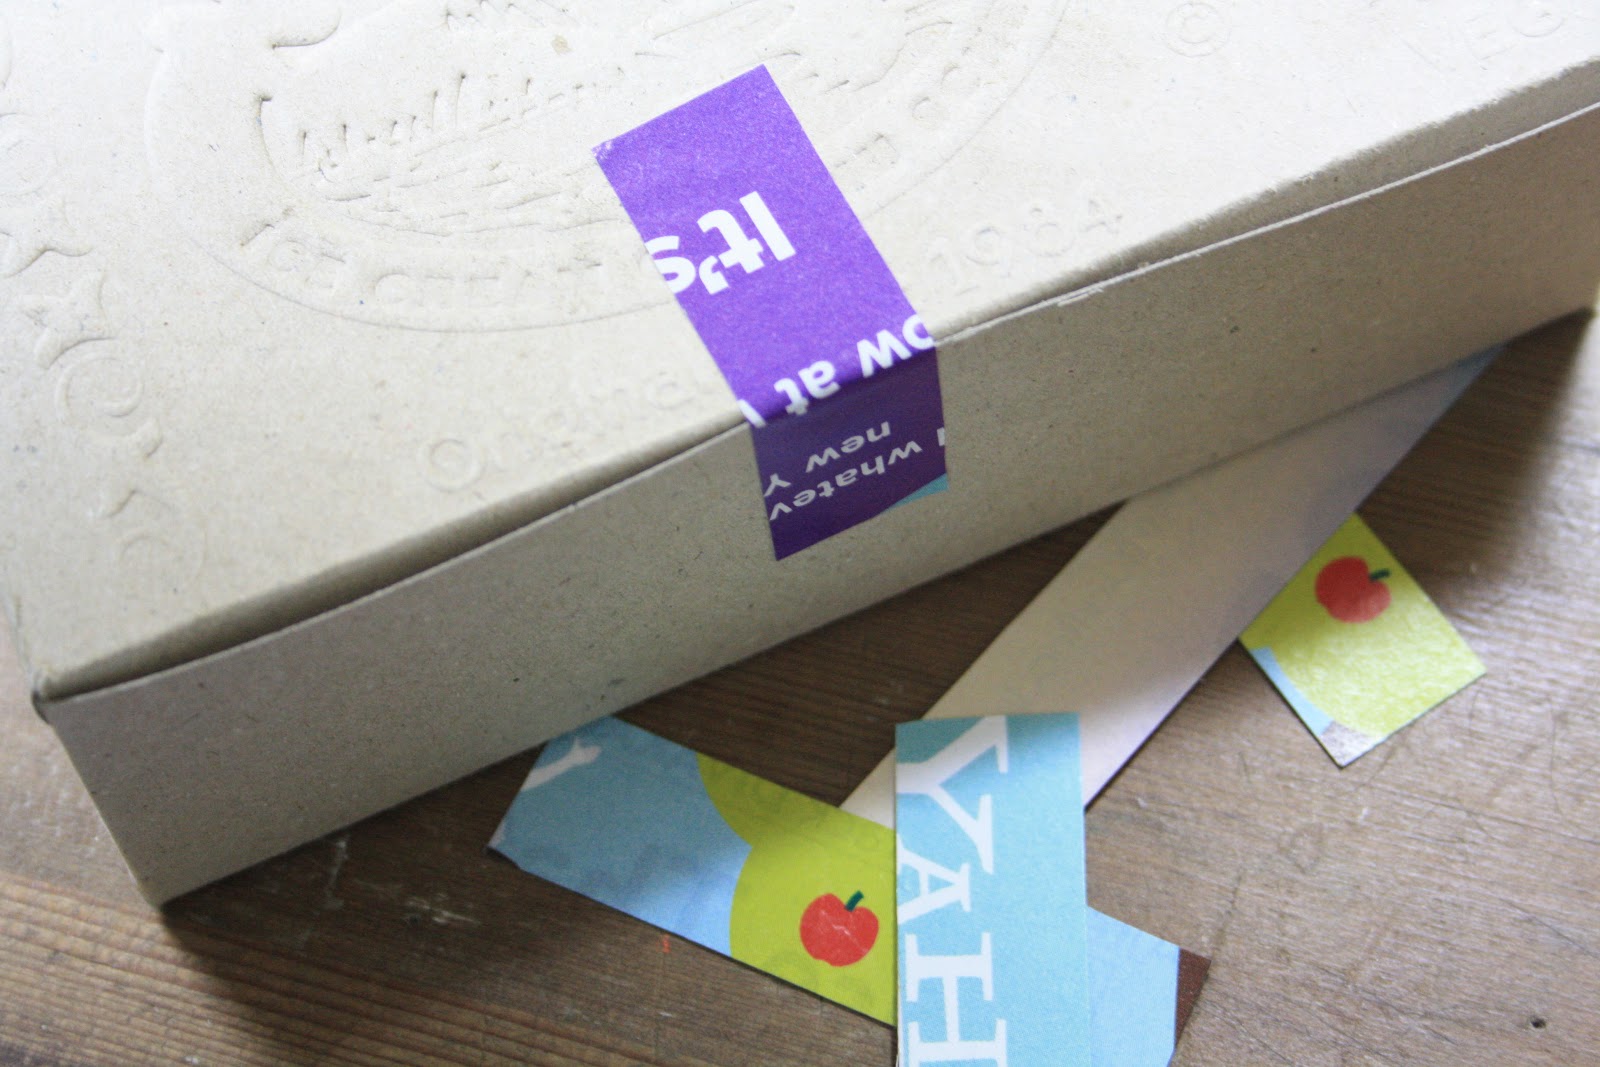
5) As usual, use it to seal envelopes or wrap gifts! I am using quite a lot of it for my penpal letters :D


So that's it for this post!
Hope you all liked it. Please feel free to leave your comments below!

Until next time, toodles!

~ Shivani ~

Thursday, 25 April 2013

DIY Fabric tape

Hola everyone!

I am back with my 2nd post. For the first time I recorded a video for you all with instructions and all, haha. So I have been craving for Washi tape all week and it's really sad that I don't get it here, in Mumbai. And of course, the online ones are really expensive. So I thought of making this! Check out the instructions below or you can also see my video on YouTube!

Link to YouTube video :  DIY Fabric Tape

So here are the things you will need:
  1. Tape (Use paper tape or even scotch tape will work)
  2. Random pieces of cloth
  3. Scissor
  4. Glue (Fevicol or Mod Podge)
  5. Butter paper (or even wax paper)


So let's beginnn!

1) Cut the butter paper according to the size of the tape. Make sure its width is more than that of the tape!


2) Cut the cloth according to the width of the tape that you are using.


3) Once you are done with that, pin up your butter paper to a neat support.


4) Okaaay now we are ready to do the real work! :P
Start by sticking the tape onto the butter paper. Since you are using butter paper, the tape will peel off easily when you want to use it!


5) Once you have done that, take the glue and start spreading it onto the top of the tape!


6) Now comes the fun part! Take the cut piece of fabric and carefully start placing it onto the glued surface of the tape! Press it firmly :)


7) Let it dry completely for 15-20 minutes! And there you go! It's readyyyy! *woohooo*


I know it's a little shabby. :P

8) Use different materials like this fabric ribbon that I found! It luckily turned out to be the same size as that of the tape so I could conveniently paste it onto the tape! :D


Here are some more that I made.


Use them in place of almost any kind of boring tape. Check out the gift boxes that I wrapped with this tape. They look oh-so-adorable!


Hope you all liked it!

Please leave your comments in the comment box below!

~ Shivani ~

Monday, 22 April 2013

DIY stamps with foam tape

So here is my first project. *weehee*
I am going to talk about how to make stamps with foam tape. I saw some really cute patterned wrapping papers at a bookstore recently whose price was horribly high! So I thought of coming up with a ‘gaavthi’ version of those stamped papers that you can use as wrapping papers or even as letterheads :D Believe me, you'll love them!
Well, I must warn you that you can only make simple patterns with the technique I am about to share and you can't really do intricate patterns with this thing.
I'll be posting another project soon that will allow you to do some fine designing for the stamps!

~ If you are bored to read everything, you can skip to the video link at the end of this post. Yes, ~
I know 
I am awesome B) 

SO LET'S START!

These are things you will need:


  1. Foam tape
  2. A block or a base (for fixing the stamp cutouts)
  3. A pair of scissors
  4. A beautiful sheet of paper
  5. A color bar or an ink pad


The method: 

1) Decide the pattern you want on your paper. (I am demonstrating a very simple striped one)

2) Pick up the foam tape and pick up your scissor. *woah* 


3) Now, start cutting the tape according to the pattern you have in mind.


Yeah, that's my hand. :D

4) Keeping the other side of the tape as it is, stick the tape on the base or a wooden block according to your pattern!


5) Once you are happy with the patter, peel off the upper covering on the tape. Voila! It’s ready! Umm almost. :P


Don't worry about its stickiness. It will go away once you stamp it
for the first time.


6) Apply your favorite color onto the stamp. I had used a brush and some diluted paint but I would suggest using a stamp pad or a color bar. :D


7) Hold your breath (and your paper) and STAMP!


Don't worry if it doesn't turn out perfect the first time. You'll get the hang of it
as and when you stamp more. :P


 8) Stamp away and create the pattern you want! Voila! It's ready!


Ignore the failed attempt on the bottom left of the picture :P


9) Let the pattern dry thoroughly. Add some more ditzy doodles to it if you wish to.

10) Use it as a wrapping paper and make sure you make it look cooler by using additional stuff like ribbons and twines.


Ta daaa!

And you are done!

For all those who are bored to read all this, check out my video on YouTube ---> (you will also get some beautiful background score with it, haha)


Try it out and let me know your views!

Hope you enjoyed it! 


I'll see you guys soon with my next project. Until then,
Adios!

~ Shivani~